Author Archives: stuartparkinsonuk

iFrame on eBay Listings

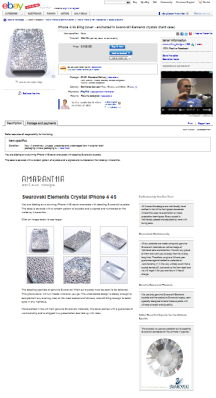
eBay pageSo, for anybody who has seen the flashy ebay listings with fancy picture sliders and stuff and wanted some of that for yourself (without paying a third party), here is one way…

Ebay allows you to add some basic formatting to your post using the WYSIWYG editor or by entering HTML code. However, it prevents you from using certain things like javascript and iframes. Also (though there are some die-hards who still swear by notepad and raw markup), creating a page that looks good in an html editor box is tedious to say the least.

What I wanted to do was incorporate a page from my website into the ebay listing page. The website I planned on using was a WordPress installation with a nice theme and some plugins which gave a nice lightbox effect to the gallery pictures. I tweaked the theme so that static content that I wanted on every page appeared in the sidebar widgets (guarantee, shipping notices, whatever) so that each page or post had the same overall format and I could just edit the content (pictures and text) for each one.

I initially tried the simple iframe tag

<i frame src="amarantha.pegasusweb.co.uk/swarovski-elements-crystal-iphone-4-4s/" width="100%" height="1500px" scrolling="no"></iframe>

in the ebay listing editor which seemed to work fine in the preview, but when I got to actually committing the page I got the infamous error message

eBay error message

Ebay does not like iframes 😦

A little research (actually a lot of googling) finally turned up this gem from The Last Drop of Ink website.

Ebay obviously scans the text you enter looking of prohibited words like “iframe”. The trick her is to use a tiny piece of javascript to insert the iframe tag dynamically into the page as it loads.

<script type="text/javascript">
<!--
var ax="ifr";var bx="ame src='htt";var cx="p://"
document.write("&lt;"+ax+bx+cx+"amarantha.pegasusweb.co.uk/swarovski-elements-crystal-iphone-4-4s/");
document.write("'width='100%' height='1500px' scrolling='no'>"+"</ifr"+"ame>");
-->;
</script>

Now this is not the most elegant bit of code – it was my first fumbling try – but in essence it breaks the ‘naughty words’ up so ebay doesn’t spot them and reassembles them and stuffs them into the page when the page loads.

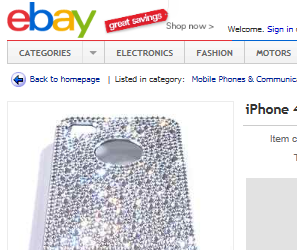
The result is this listing – I don’t know how long this link will work – which is the ebay listing containing this page from my WordPress site.

Next challenge is to get the iframe auto-resizing. Note that at the moment the height is set fixed.
Desktop Publishing for Newbies

So this post is primarily for my friend Steph who is in charge of producing the magazine for the local Scientology Mission in Poole, but is obviously equally applicable to anybody who wants to knock up a brochure or newsletter etc. and is new to desktop publishing.

Now, I am no master at this myself, so please forgive any blunders. In fact, the sole extent of my authority on this subject is that I know more than Steph, so be warned!!

Getting the Software

First step is obtaining and installing the software you will need. We will be using two packages, one for general photo editing and another for the ‘DTP’ layout.

PixBuilder Studio

This software is free (thank you to WnSoft) – download it from http://www.wnsoft.com/pixbuilder/ and run the downloaded file to install the program. The installation is pretty straightforward.

Scribus – DTP Software

This is another free program called Scribus which is a desktop publishing program (a bit like Microsoft Publisher). Before downloading and installing this, it is best to download and install a utility called Ghostscript from http://www.ghostscript.com/download/gsdnld.html – choose the download from the GPL column for your system.

Once installed, head over to the Scribus Download page and choose the install for your system. You may get redirected to the Sourceforge site to download the program – that’s okay. Run the installation for Scribus, and you’re ready to go.

Getting Started – The Basics

Desktop Publishing is the art and technology of taking images and text and laying them out on a page in an arrangement which is both easy to read and visually appealing. There is a huge amount of technology behind this, but the basics are fairly simple. First, a basic understanding of some of the terms will help.

Images

Images in electronic format (from a camera, downloaded from the net, etc.) are made up of millions of tiny dots called pixels. Each pixel can be a different colour, and placed together the pixels make up a complete image. There are two things which determine how good the image looks – number of pixels and number of colours.

Number of pixels


Obviously a picture made up of just 4 x 4 pixels (16 in total) would not be much of a picture.

This image is about 2 inches square (this will vary depending on your monitor) – 4 pixels in two inches gives us a resolution of 2 pixels per inch.


More pixels, say a 20 x 20 grid (400 pixels in total) starts to become recognisable, but very blocky.


This next picture is 100 x 100 pixels – about 50 pixels per inch. You can still see the pixels, but the quality is much better.


Obviously, if this image were half the size, you would not notice the pixellation so much. It has the same number of pixels, but because it is printed smaller it has more pixels per inch (about 100 in this case).

To get good quality printed pictures, the general standard is 300 pixels (or dots) per inch – ‘300 dpi’. Therefore if you want a picture an inch square, it should be at least 300 pixels square it it’s going to look any good (a total of 90,000 pixels). If you want the picture to take up half an A4 page (thats about 5 x 8 inches) then you need 1500 x 2400 pixels, a total of 3,600,000 pixels or 3.6 megapixels.

Number of Colours

This is less of an issue nowadays as there are plenty of colours available to modern digital images, but its worth a mention. This is the same image, but rendered using a pallet of only 256 different colours.
The number of different colours is usually described by the number of digits the computer uses to represent each colour, and is actually expressed as binary digits or bits. The above is an 8-bit image (total of 256 different colours). Poor quality or old images may be 16-bit or 65,353 colours. Modern digital cameras usually generate 24-bit images with millions of colours, and the best high end devices can generate images at even more than this.
A Note on Image Sizing

When working with images on your computer, each image takes up a certain amount of memory space. Modern digital cameras will generate images which are several thousand pixels across – for example a 12MP camera produces an image about 3000 x 4000 pixels – thats enough to print at 10 inches by 13 inches at 300 dpi. However, those 12 million pixels take up a lot of memory, and if you have several such pictures then things will start to slow down, especially if you have an older pc.
If you actually only needed a half an A5 page image, you really only need about 1800 x 1200 pixels – that’s only a 2 megapixel image and takes up about 80% less memory than the 12MP image.

The lesson to learn here is to trim your pictures to a sensible size before using them in your DTP package.

Video Lesson 1 – Straighten, Crop, Resize, Brighten


Thursday – Arthurs Pass to Lake Tekapo


We started the day with a hearty breakfast and a half day trek to the Bridal Veil falls and back. Unfortunately these were a little disappointing as you couldn’t get very close and the view was obscured by heavily overgrown bush. Despite that, the trek through the beech forest was a lovely walk.

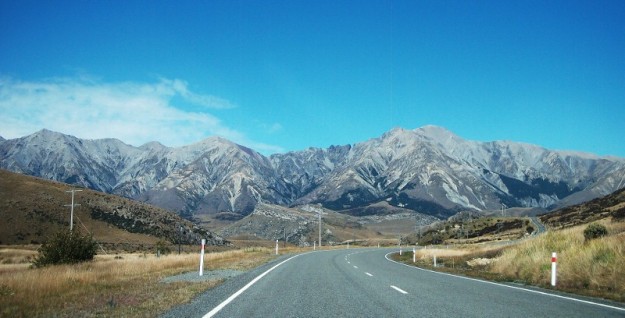
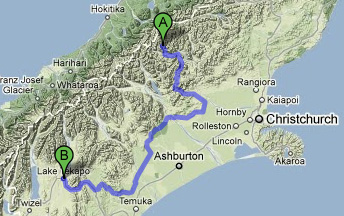
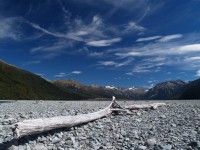
Then on to Lake Tekapo. This was a long drive, over 300 kms, and took us all afternoon, not helped by our frequent photo stops! Here is a picture of the Waimakariri river valley as you leave Arthurs Pass…

Later, the scenery started to change, first to the more arid foothill shown below, and then to the vast expanse of the Canterbury Plains.

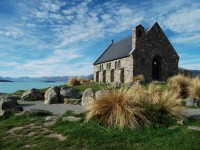
We finally arrived at Lake Tekapo just as the sun was going down, just in time to grab this shot of the lovely little Church of the Good Shepherd which sits quietly on the lakeshore.

Church of the Good Shepherd, Lake Tekapo

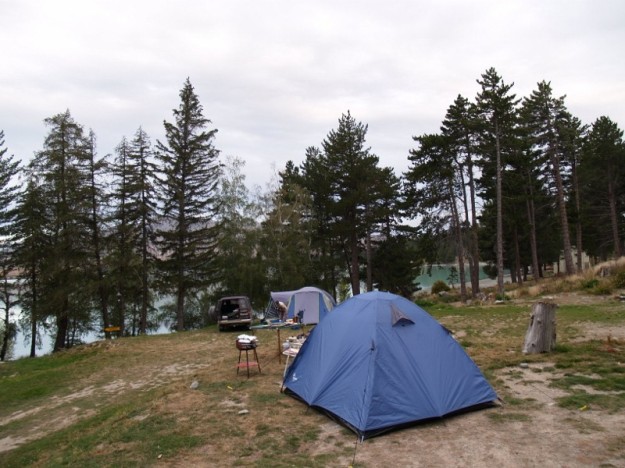
Then to our campsite, also right on the lake shore. It was pretty busy here, with all the motels and cabins taken and only a few tent pitches left. I think there were a lot of people escaping the Christchurch earthquake had come to Tekapo to get away and to find temporary schooling for their kids.

Again we got a pitch overlooking the lake…

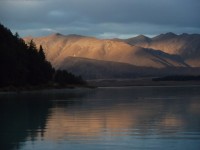
… and while I sizzled some steaks on the barbie, Megan took a couple of shots of the lake at sunset …

Lake Tekapo at Sunset

Lake Tekapo Sunset

And so ended the fifth day.

Wednesday – Hokitika to Arthur’s Pass

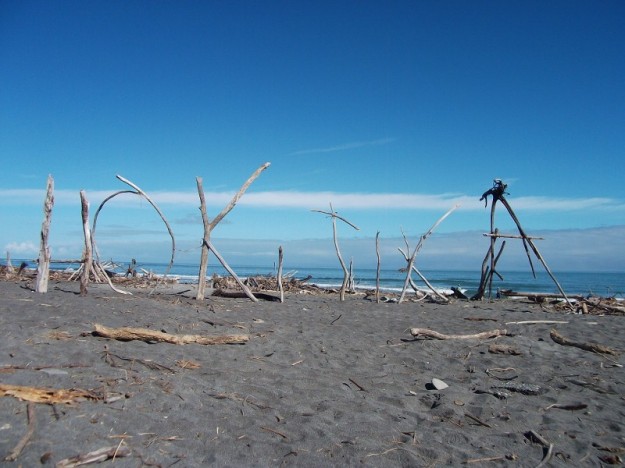
Hokitika was a nice town, though we didn’t take many pictures there. One shot Megan did get was the driftwood ‘sign’ on the beach which has become something of an icon for the town (you see it on tee-shirts and allsorts)

Hokitika

Highlight of our stay in Hokitika was the Kiwi House – an exhibit where they have a couple of real live kiwis in a nocturnal setting and we watched them rooting around for grubs and digging and sniffing underground with their long beaks – quite fascinating. At the same place they also had giant eels (a couple of meters long and as thick as your thigh!), ordinary eels which we got to feed ourselves, and some tuatara (iguana like lizard things that date back to the dinosaurs and are found only on NZs South Island). Well worth a visit.

Striking out for Arthurs Pass, we stopped off at Londonderry Rock – a huge boulder which the early gold miners managed to dislodge from the mountainside and which apparently made quite a noise when it fell. It was kind of buried a bit in the bush so getting a photo of the whole thing was tricky, but it weighs between 30000 and 40000 tons (big rock!). Here is a pic of Megan lifting up one end of it.

Megan lifts Londonderry Rock by herself - Amazing!!!

The road to Arthurs Pass was a stunning mountain highway with beautiful scenery around every twist and turn. The whole Southern Alps are very unstable, and parts of the road are prone to regular rock falls and landslips. This pic shows a rock shelter, and you can see evidence of the latest landslip above it. Note also the waterfall, er…, shute, roof, umbrella thingy too.

Otira Highway Rock Shelter

A little further on is the Otira Highway Viaduct which they built when they got tired of having to re-route the road every time there was a rockfall. The original highway went up above the slip on the right of the photo, but apparently never stayed in one place for long!

Otira Highway Viaduct

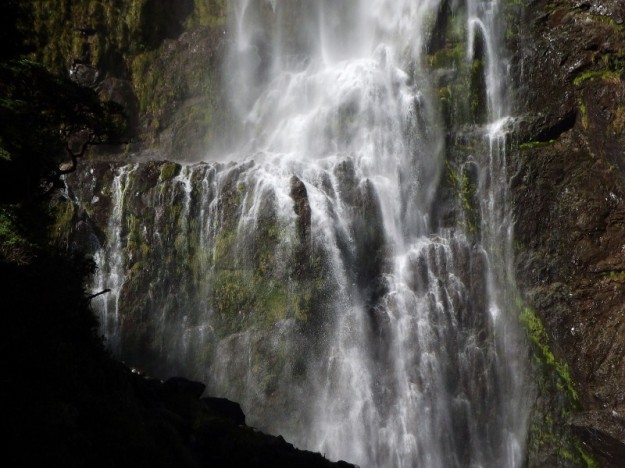
Once at Arthurs Pass we treated ourselves to a motel room and then went in search of the Devils Punchbowl Falls. A 30 minute trek brought us to these spectacular views.

Devils Punchbowl Falls

Devil's Punchbowl Falls (top half)

Devils Punchbowl Falls Closeup

A hearty meal and a well earned beer in the Wobbly Kea restaurant, and that was the end of day 4.

Tuesday – Fox Glacier, Lake Matheson, and up to Hokitika

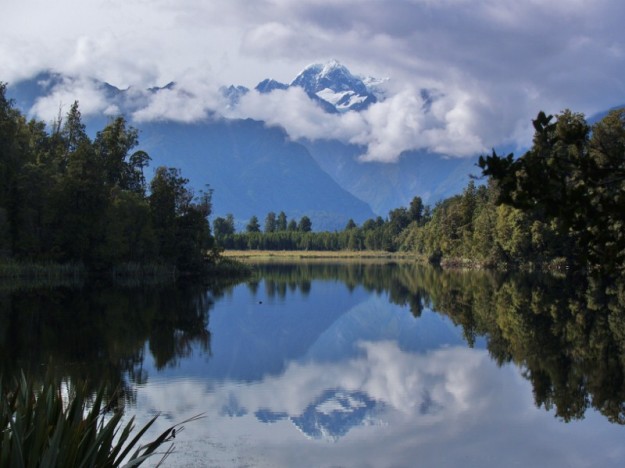
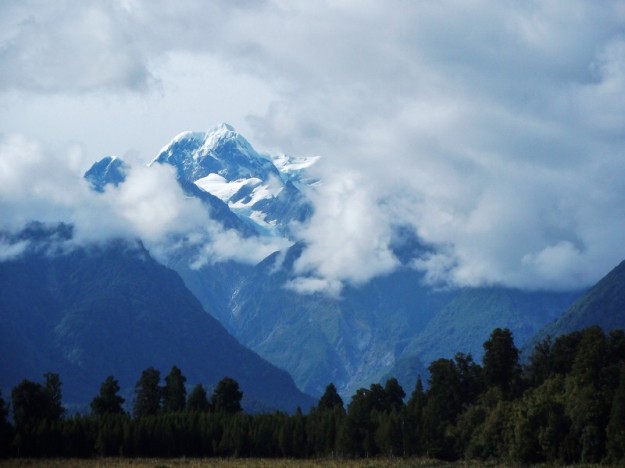
First stop from the township of Fox Glacier was a brief excursion out to Lake Matheson. Unfortunately it was a little cloudy that morning so the views of Mount Cook reflected in the lake (like you see on all the postcards) were a little elusive. However, the view was still good.

Mount Cook reflected in Lake Matheson

A closer view of Mount Cook

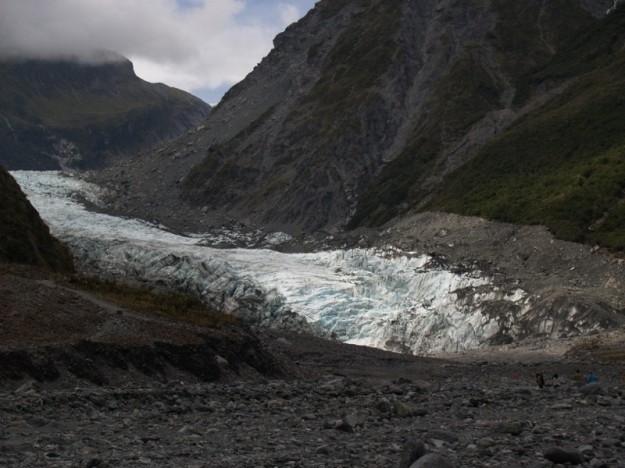
Then we returned to visit Fox Glacier itself. We were surprised at how filthy it was, naively expecting a pristine white wall of ice. This may be how it is up top, but by the time it reaches the bottom of the valley it has collected hundreds of tons of debris from rock falls and erosion, and the bottom section is a filthy mixture of rock and ice.

Fox Glacier

It is hard to get the size from this photo. Here is a close up of part of the lower glacier where a guided party of tourists are walking on the ice.

People on Fox Glacier – get the size of the thing now?

The Fox River emerges from a small ice cave at the foot of the glacier (all the melt-water tends to drain down through crevaces in the glacier and emerge at the foot of the ice wall at ground level). The river carries boulders of ice with it. The ones below are just small ones, but chunks the size of a camper van fall off the front face daily!

Ice boulders

From Fox we drove north up the coastal highway to Hokitika. As time was short we skipped the Franz Joseph Glacier, and made it to Hokitika early evening in time to pitch tent and burn some chicken on the barbeque!

Monday – Through the Haast Pass to Fox Glacier

Hawea to Fox

We left the campsite at Hawea early, snapping this shot of a dawn fisherman as we were striking camp.

Dawn fisherman on Lake Hawea

We headed down the southern tip of the lake just the check out the view…

Lake Hawea from the South Shore

… and then drove up the west shore of the lake …

… and at ‘The Neck’ we left Lake Hawea …

Lake Hawea at The Neck

and joined up with the eastern shore of Lake Wanaka.

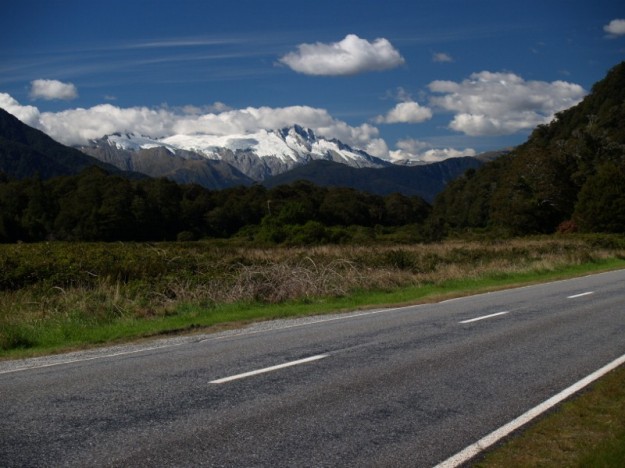
From the top of Lake Wanaka you enter the valley of the Makarora river and follow it up through the Haast Pass. Beautiful scenery, and we just had to stop off at numerous places along the way to snap a few waterfalls and so on. Here’s a shot of the Fantail falls half way along the pass. We also stopped at the Thunder Creek falls and the Roaring Billy, as well as the Blue Pools.

The Fantail Falls, along the Haast Highway

After taking so long getting through the pass (and little wonder with scenery like this…)

Haast Pass - just another typical spectacular view.

it was getting close to tea time by the time we passed through Haast itself, and we still had a ways to go, so it was foot down to Fox Glacier where we treated ourselves to a room in the lodge at the camping ground and a long hot shower 🙂

Sunday – Invercargill to Cromwell and Lake Hawea

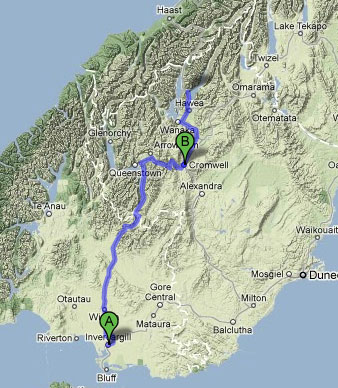
Invercargill to Hawea

Our little tiki-tour of the South Island started with a drive up to Cromwell Races where All Spice was racing. He came in fifth this time, and here he is working his way up the field.

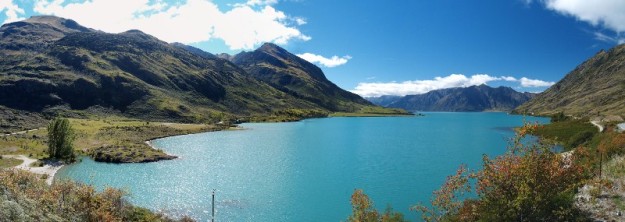
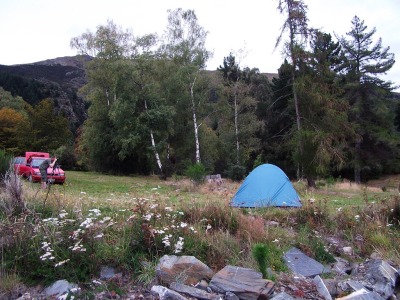
After the races we drove on to Lake Hawea, arriving at the campsite early evening. We had a pitch right on the lake front with not another soul in sight, and it was idylic. Here’s a snap of the tent on the lakefront, and the spectacular view.

Lake Hawea campsite.

Lake Hawea campsite.

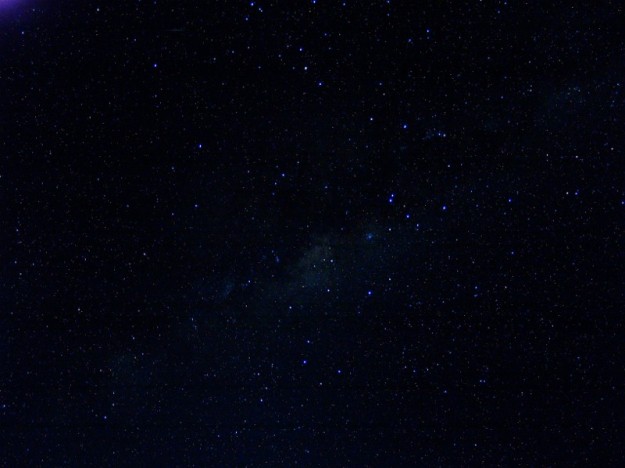
After tea cooked on the barbeque and an early night, I awoke before dawn to the most spectacular array of stars and the milky way stretching across the night sky. With no light for miles around and a crystal clear sky, the stars were unbelievable, and I just had to try to capture it on camera…

Starry Sky

Web Safe Fonts

These fonts are supposed to be web-safe!

font-family: Impact, Charcoal, sans-serif;
Normal Bold Italic Bold/Italic

font-family: ‘Palatino Linotype’, ‘Book Antiqua’, Palatino, serif;
Normal Bold Italic Bold/Italic

font-family: Tahoma, Geneva, sans-serif;
Normal Bold Italic Bold/Italic

font-family: Century Gothic, sans-serif;
Normal Bold Italic Bold/Italic

font-family: ‘Lucida Sans Unicode’, ‘Lucida Grande’, sans-serif;
Normal Bold Italic Bold/Italic

font-family: ‘Arial Black’, Gadget, sans-serif;
Normal Bold Italic Bold/Italic

font-family: ‘Times New Roman’, Times, serif;
Normal Bold Italic Bold/Italic

font-family: ‘Arial Narrow’, sans-serif;
Normal Bold Italic Bold/Italic

font-family: Verdana, Geneva, sans-serif;
Normal Bold Italic Bold/Italic

font-family: Copperplate / Copperplate Gothic Light, sans-serif;
Normal Bold Italic Bold/Italic

font-family: ‘Lucida Console’, Monaco, monospace;
Normal Bold Italic Bold/Italic

font-family: Gill Sans / Gill Sans MT, sans-serif;
Normal Bold Italic Bold/Italic

font-family: ‘Trebuchet MS’, Helvetica, sans-serif;
Normal Bold Italic Bold/Italic

font-family: ‘Courier New’, Courier, monospace;
Normal Bold Italic Bold/Italic

font-family: Arial, Helvetica, sans-serif;
Normal Bold Italic Bold/Italic

font-family: Georgia, Serif;
Normal Bold Italic Bold/Italic

font-family: ‘Bookman Old Style’, serif;
Normal Bold Italic Bold/Italic

font-family: ‘Comic Sans MS’, cursive;
Normal Bold Italic Bold/Italic

font-family: Garamond, serif;
Normal Bold Italic Bold/Italic

font-family: ‘MS Sans Serif’, Geneva, sans-serif;
Normal Bold Italic Bold/Italic

font-family: ‘MS Serif’, ‘New York’, sans-serif;
Normal Bold Italic Bold/Italic

font-family: ‘Arial Black’, Gadget, sans-serif;
Normal Bold Italic Bold/Italic